Service Catalog
The service catalog provided to your end users will act as a self-service portal, so that users can order what they need depending on what is offered in the service catalog. Just think of a web shop and you get the idea.
However, ServicePlaza’s Service Catalog is way more than a web shop. As to provide IT-services to your users you may need additional information’s from the requester and those may be customized as required.
Catalogues & Catalog Groups
ServicePlaza may provide a single or multiple catalogues to users depending on their access level.
Groups organize a service catalog items into logical groups. Administrators and authorized users can create and configure groups (and subgroups), according to their needs and later add items into these groups.
Groups (in first level) can have a subgroup, which acts as a child item. However, those subgroups will not show up in the service catalog.
Catalogues and catalog groups are configured in the service settings configuration.
Catalog Items
The service catalog is a collection of catalog items. It may be grouped or split into different catalogues, see previous chapter.
There are two major service catalog item types available:
-
Service
If a service catalog item is ordered, it will be tracked into the users’ inventory as a commercial subscription service. Services are typically used for subscription services, like Microsoft Office365, but Services are also used for goods, like a Laptop, Monitor as tracking of those devices may also be relevant in the customers service strategy. A Service may also be a combination (a bundle) of multiple assets, like a “Standard workplace” (consisting of Laptop, Monitor, Keyboard, Mouse, Headset, ..).For every service ordered, those may also be terminated by the users.
-
Change
A change item in service catalog, will not be tracked in a monthly subscription service. Therefore, a change may only have a one-time price. Typical changes could be “Reset Password”, “Assistance request” or “User Change Request”.
The Service Catalog takes you to the overview, where the tiles for services, products, cancellation, and changes are located:

In the respective view, you will then see all services, changes, or products, regardless of which catalog they belong to.
Create Service/Change Items
In the overview page of the services or changes, all created items are displayed in the columns ID, Name, Group, Catalog, incl. Products, monthly price, one-time price and orderable displayed in table view, see below:

General
Opening an item, the following options exist:
| Parameter | Description |
|---|---|
| Orderable (Yes/No) | This parameter determines whether the service can be ordered or not. If it is set to Yes, the service can be ordered. If the criterion is not met, it can no longer be reordered. The stock remains unaffected, will be continued and, if the billing is used, will continue to be billed. |
| ID | A unique ID must be entered here, e.g. the catalog ID. The ID is free to assign. |
| Name | The name of the service that is entered at this point appears in the menus and on tiles as the title. The name cannot exceed 40 characters. |
| Name ID | Name ID should be a unique service name that identifies it. It is freely definable. |
| Group / Subgroup | For group and subgroup, a selection is provided with all groups and subgroups that have been created in the system. By grouping into a group and, if necessary, a subgroup, the selection can be reduced during filtering or sorted accordingly. |
| Catalogue | In this pull-down menu, all catalogs created in the system are displayed for selection. Once a catalog has been selected, the service is associated with that catalog and can be used there (depending on the authorization). |
| Display priority | The display priority regulates the order in which the tile of a service is displayed or a change in the service & product catalog. The smaller the entry or number, the further forward in the display the tile appears. The range can be between 0 and 2147483647. The display priority is not based on the affiliation to a catalog or whether it is a service or order or a change. |
| flat-rate billing | If the flat-rate billing is chosen, the special quantity must be specified for the service as soon as it has been ordered for each upcoming billing. If the special quantity is not entered, a monthly statement cannot be completed. |
| View Stock | This function enables on the tile and in the order mask whether the corresponding product stock data should be shown (Yes) or not (No). It is displayed either in stock or out of stock. The prerequisite for this is that the warehouse management has been previously configured in the product. If this has not been done and this option is set to Yes, the stock has not yet been determined and therefore is displayed pending. |
| SLA | In this selection field, an SLA created in the system must be selected for the service. |
| Minimum term (in months) | The minimum term determines the period after which the service can be cancelled. Example: If 24 is entered here, the service can be terminated prematurely, but will continue to be charged until the end of the minimum term of 24 months. |
| Acceptance when ordering - AutoClose function (Yes/No), after days | The AutoClose function ensures that orders are closed when they are completed, but sign off does not take place within a certain time frame. The time when this is to be done is determined and entered in days. |
| Acceptance upon order and termination - acceptance / with document (Yes/No) | Acceptance with and without document is activated if a yes is selected for acceptance. If a formal document is required for this, this can be demanded with a further yes for acceptance. This must then be uploaded to the ServicePlaza in the corresponding process step before acceptance can take place. |
Prices
The Prices tab is used to create, maintain, and manage prices and their validity period. There is basically the purchase and the sales price for the respective service. The following figure shows the initial prices tab.

You can set a monthly and/or one-time price for both prices. It is not mandatory to specify both, as there are services that may only require one of both prices and may be free of charge. Therefore, you can always create a service with only a one-time price, only with a monthly price or without prices. If there is only a one-time price for e.g., a service, this amount will be confirmed and billed by the acceptance in the billing period after the service has been provided. The monthly price will be charged for the first time after acceptance of the facility, until it has been cancelled. This applies to the purchase price as well as to the sales price.
One-Time Billing
The One-Time Billing configuration allows administrators to define the payment structure for a specific service. While the system allows for recurring subscription models, this setting enables services to be processed as a single, non-recurring transaction. This is particularly useful for hardware orders, one-off installation fees, or singular consulting services that should not trigger a recurring monthly invoice.
Configuration
To change the billing mode from a subscription to a one-time charge:

- Open the service settings and navigate to the Prices tab.
- Locate the section labeled Mode of payment.
- Click the dropdown menu and select Purchase.
- Click Save to apply the configuration.
System Behavior & Additional Information
- Invoice Representation: Services configured as a "Purchase" will appear on the generated invoice as a singular charge for that specific billing period, rather than a recurring monthly position.
- Subscription Reversion: To revert the service to a recurring billing cycle, change the mode back to Subscription.
- Price Fields: Ensure that the cost is entered in the appropriate field (e.g., One-time price or Purchase price) that corresponds to the selected mode to ensure accurate calculation.
Relationships between billing and accounting
If there is no price, an inventory is displayed in accounting, but there is no settlement for this item. The price therefore has no direct relation to the stock and does not change it. This means that a service can be managed in the inventory and shown in the corresponding reports as a 0.00 Euro item. This means that if a price has expired from its validity, it will no longer be billed afterwards, but will appear in the inventory. For this reason, it is an essential task for the responsible persons to check the prices to check whether prices exist for all billable items, which are correct and valid. This applies to both purchase and sales prices.
The following table describes how to fill in the fields.
| Parameter | Description |
|---|---|
| Active Prices - Purchase Price | Represents the current monthly and one-time active purchase price. These depend on their validity period and are entered under Prices on the lower half of the tab. If there is no valid price, 0,00 € will be displayed. |
| Active Prices - Selling Price | Represents the current monthly and one-time active selling price. These depend on their validity period and are entered under Prices on the lower half of the tab. If there is no valid price, 0,00 € will be displayed. |
| Prices | Valid until Determine until which time a price is valid. It applies to the first entry from the time of creation until the expiry of the date if valid until. If there is another price with a longer validity date, this price will be used afterwards. If an entry exists with an earlier expiration date and this date has not yet been reached, this entry applies. As a result, the price whose expiration date has not yet been reached and the expiration date of the previous period has already expired always applies. Monthly Price Purchase Sets the price to be paid monthly for procurement. Monthly price sale Determines the price that must be paid monthly by the consumer or charged to the user. One-time costs purchasing Sets the price that must be paid once at the beginning for the procurement. This can be, for example, a set-up price or a proportionate pre-investment that must be made. One-time cost sale Sets the one-time amount for the provision of a service, which will be charged to the customer when ordering after acceptance. |
Assignment
The Assignment property page allows you to assign the products and assign a product selection for this service. If, for example, workplace equipment is offered as a service in a package, it can consist of a PC, a screen, a mouse, etc. On the tab Assignment the compilation of this package takes place. You can also use the product selection to provide a product selection for individual product types.

Whether a product is to be entered as an asset in the CMDB or not is configured on the product in the product catalog. A product assignment is always to be seen as an alternative.
Furthermore, you can individually determine on the product whether it can be ordered or not. This is useful, when a manufacturer releases a new model and the old one is no longer available. In this case, the predecessor model can be marked as no longer orderable by removing the check mark Orderable.
Permissions
The Permissions form page enables the assignment of roles and thus the authorizations for order management for this service / change. Three areas are reflected:
- Approvals:
Specifies if the item needs an approval or not. There are three types of approvals: Technical, Commercial or by approval group. Approval group lists may be configured in the corresponding settings. - Price:
Sets if the configured prices are available to the users view or not, depending on their role. - Orderable
Defines if this item is orderable or can be terminated by the specified user roles.
Description
On the Description input mask, you define how a item is displayed on the tiles, in menus and tables. Furthermore, there is the possibility to upload a picture or use a predefined.
The abstract is usually used next to the name of the General tab in parent menus or on tiles. The long description is used in the process steps in which the user may need further information about the item.
Please note the following limitations:
- Picture
must correspond to one of the file formats .jpeg, .jpg, .png, .gif and must have at least 32 x 32px and may have a maximum of 256 x 256px. With the Browse button you can upload a suitable image via the browser function. You can use the Reset button to remove an image. - Abstract
should not exceed 100 characters. - Long description
should not exceed 500 characters, otherwise these can no longer be displayed completely in the corresponding masks.
Manage Multilingual Translations
The Manage Multilingual Translations feature enables administrators to localize the service descriptions directly within the system. This function specifically allows you to provide translations for the Short description and Long description fields. By doing so, you ensure that end-users understand the service details in their native language, reducing misunderstandings and improving the overall user experience.
Configuration
To add translations to a text field:
- Navigate to the Description tab within the service settings to access the main content fields.
- Identify the input field you wish to translate (e.g., Short description or Long description).
- Click the Translation Icon (language symbol) located on the right side of the text field. For the Long description, click the Translate button found at the bottom of the editor.
- In the pop-up window, enter the appropriate text for the desired languages, for instance German or English.
- Click Save to store the translations.


Key Considerations
Here are a few important points regarding how translations function within the system:
-
Targeted Scope: This translation capability is exclusively applied to the service description fields. It allows you to customize both the brief summary (Short description) and the detailed content (Long description) for different languages.
-
User Experience: The system automatically displays the correct language version to the end-user based on their browser settings or user profile preferences. If a specific translation is missing for the user's language, the system will default to the primary text defined in the main field.
-
Efficient Management: By utilizing this feature, you avoid the need to create duplicate services for different regions. A single service configuration can simultaneously support multiple languages.
Service Configuration
The Configuration tab is used to manage the behavior and mandatory requirements of the information gathered during the ordering process.
On-site operation
This parameter determines if on-site support is integrated into the service. Depending on the selection, the system will prompt the user to provide specific on-site contact information.
| Option | Description |
|---|---|
| Yes, optional | On-site support is available but can be skipped by the user. |
| Yes, required | Users must provide on-site contact details to complete the order. |
| No | No on-site support is offered for this service. |
Shipping Information
This setting defines whether physical shipping details are necessary for the fulfillment of the service.
| Option | Description |
|---|---|
| Yes | Displays an additional mandatory address query during checkout. |
| No | Shipping information is not requested. |
Service with location
When enabled, this ensures that specific facility data is captured. It makes building, floor, and room information mandatory fields.
| Option | Description |
|---|---|
| No | Location data is not required. |
| With additional data | Mandatory location selection including detailed sub-fields. |
| Without additional data | Basic location selection without extended details. |
Service with phone number
Controls the visibility and selection pool of phone numbers available to the user during the ordering process.
| Option | Description |
|---|---|
| Yes, only existing phone numbers | Users must select from numbers already registered in the system. |
| Yes, only free numbers | Users can only select unassigned/available numbers. |
| Yes, all phone numbers | No restriction; all numbers in the database are selectable. |
| No | Phone number selection is disabled. |
Phone number required
defines, if the phone number is optional in ordering process or not.
| Option | Description |
|---|---|
| Yes | Providing a phone number is mandatory. |
| Optional | Users may provide a number but are not forced to do so. |
Filter phone number group
This filter allows you to restrict the selection to a specific range of phone numbers. It is particularly useful for scenarios such as PC-Fax applications or department-specific number blocks.
Filter User Groups
This parameter applies a filter to the target user selection. It ensures that the service can only be ordered for individuals belonging to specified user groups.
Location Filter
This setting synchronizes the order location with the user's profile data. It is primarily used to lock the location selection, preventing manual changes and ensuring data consistency.
| Option | Description |
|---|---|
| No | Users can manually select any available location. |
| Location | Locks the selection to the location stored in the user’s account. |
| Authorization Group | Filters available locations based on the user's assigned authorization group. |
Custom Form
1. Overview
In order to collect all the information required for a user's request, it may be necessary to ask additional questions.
ServicePlaza includes a form builder that allows you to create custom forms using a drag-and-drop interface.
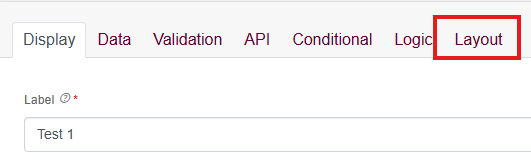
Each component in the form can be configured and adjusted to influence how it will later be displayed in the final output.
To configure a component, open its settings by clicking the gear icon and then navigate to the "Layout" tab.
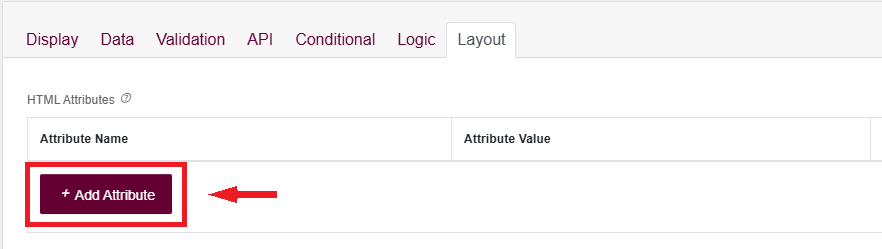
In the "Layout" tab, you will find the "Add Attribute" button.
When you click this button, two input fields appear where you can define:
- Attribute Name
- Attribute Value
You can assign multiple attributes to the same component. In theory, there is no technical limit to the number of attributes you can add.
2. Supported Attributes
The following six attributes are currently supported:
2.1 Heading
Description:
Adds a heading above the component in the final output.
Value type:
- string (text)
- Example: "Hello123"
2.2 space-before
Description:
Adds vertical spacing before the component in the final output.
Value type:
- integer
Allowed range:
- 1 to 9999
2.3 space-after
Description:
Adds vertical spacing after the component in the final output.
Value type:
- integer
Allowed range:
- 1 to 9999
2.4 order
Description:
Defines the position of the component in the final output.
Components are sorted in ascending order based on this value (the smallest number appears first).
Value type:
- integer
Allowed range:
- 1 to 9999
2.5 hide
Description:
Controls whether the component is shown in the Order summary/output.
If hide is set to true, the component will not be displayed, but its data will still be included and stored in the Order.
Value type:
- boolean (true / false)
2.6 ignore
Description:
Controls whether the component is completely excluded from the Order.
If ignore is set to true, neither the component nor its data will be included in the Order.
Value type:
- boolean (true / false)
Please use the existing documentation of the form builder for further assistance.
3. File Uploads in Custom Forms
The "Services" and "Changes" modules now support direct file uploads within custom forms. This feature enables users to upload documents and images directly during the submission process. Instead of using complex external storage providers, this integration leverages the system's native attachment handling.
Configuration Guide
To enable file uploads in a form, you must use a standard HTML element instead of the native Form.io "File" component.
Step-by-Step Implementation
1. Open the Form Builder for the target Service/Change.
2. Drag and drop an HTML Element into the form layout.
3. In the component's settings, insert the following HTML code:
html
    <input type="file">
4. Save the form configuration.
Uploaded files are automatically stored as attachments in the respective process, enabling customers and ticket handlers to exchange documents directly through the form.

This improves communication and ensures that all relevant files are stored within the respective process.
Specify Order Quantity
The Specify Order Quantity feature allows end-users to request multiple instances of a specific service or item within a single transaction. By default, service orders are restricted to a quantity of one. Enabling this feature is essential for scenarios requiring bulk orders, such as requesting multiple hardware peripherals or software licenses at once.
Configuration
To enable this feature for a specific service:
- Open the service settings and navigate to the Configuration tab.
- Locate the checkbox labeled Quantity adjustable.
- Check the box to activate the feature.
- (Optional) Enter a number in the Max orders field to set a ceiling for the maximum quantity allowed per order (e.g., 20).
- Click Save to apply the changes.
System Behavior & Additional Information
- Shopping Cart Interface: When this option is active, the static quantity indicator in the shopping cart is replaced by an interactive input field with Plus (+) and Minus (-) buttons.
- Cost Calculation: The system automatically aggregates the total costs (both one-time and monthly) based on the user's input.
- Default State: If this option remains unchecked, the user is restricted to ordering exactly one unit per request.
Instant Order Without Cart
The Instant Order Without Cart feature streamlines the ordering process by removing the intermediate shopping cart step. This is ideal for simple, frequently requested services or urgent changes where a multi-step checkout is unnecessary. When enabled, the user can submit the request with a single click directly from the service page.
Configuration
To enable this streamlined workflow for a specific service or change:
- Navigate to the Service or Change settings and open the Configuration tab.
- Locate the checkbox labeled Skip cart (next to the "Order directly" label).
- Check the box to activate the feature.
- Click Save to apply the changes.


Key Considerations
Enabling this option significantly alters the user interface and workflow:
-
Workflow Bypass: The standard "Add to Cart" functionality is completely disabled. The item does not go into a shopping basket for later checkout but is processed immediately upon submission.
-
Interface Changes: On the service detail page, standard buttons (such as "Add to Cart") are hidden. They are replaced by a single Order directly button in the bottom right corner.
-
Immediate Execution: Clicking the Order directly button triggers the order submission instantly. Users should ensure all required fields (like location or file uploads) are filled out before clicking.
Change Configuration
Configuration tab is used to query behavior of required information in the ordering process. For this purpose, there are fixed parameters that are the same for each change if required. These are activated, configured or deactivated via the settings in the respective pull-down menu at the top of the tab.
Basic
You can use the Change Type parameter to specify what kind of change is to be made. You can choose between by employee, on employees/phone numbers, by service, by assets, Move, Transfer or Migration.
The following table explains which menu item contains which type of changes:
| Parameter | Description |
|---|---|
| Type of change | By employee In this case, a ticket is not placed on a specific service, asset or phone number, but on the user who is currently logged it. The option is used if it is a generic or personal or individual change. ** On employee / phone number When selecting employee / phone number, an employee with a telephone number must be selected when creating the order. This is to be applied, for example, whenever it is a change at an extension of a telephone system, a collective connection, or the like. By service If the change is to be made to a specific service, this option must be selected. This can be, for example, an application service whose configuration is to be changed. ** By asset If the change is to be made to a specific asset, this option must be selected. This can be, for example, a computer, a server, a switch or a telephone whose configuration is to be changed. ** Move Relocation is to be chosen when a service or asset is moved from one place to another. This is a physical change in the location. In this case, it can be a change with a task, but it can also be a purely documentary change. ** Transfer A rebooking is necessary if the service is to be assigned to another person or a different cost center. In this case, too, it can be a change with a task, but also a purely documentary change. ** Migration **The Migration change type is used when it is possible to migrate a service to another service. It is in fact a termination and an order in one. This usually comes into play if, for example, an analog extension is to be "rebooked" to an IP extension and thus migrated. Another example would be if an "upgrade" of a service is to take place, e.g. from Basic to Advance, which then has a larger range of functions or a better SLA. |
| On-site deployment | With the parameter on site use you can determine whether this should be offered and whether this is optionally (optionally) available or whether this is even necessary. As soon as you select Yes, Optional or Yes, Required, the shopping cart will be asked for the location, if an on-site assignment should or must take place. |
| Change with location | With the parameter Change with Location, you can determine whether the planned change is site-specific or not. You have the option of selecting them with additional data or without additional data. This includes information on the building, floor and room and determines whether the location must be specified with floor and room. If additional data is selected here, this information is mandatory. In the case of no additional data, the entries are not mandatory, i.e. optional. The entry Building is always optional. |
Filter Options
In general, there are the selection fields Employees, Phone Numbers, Service and Asset, which can be shown or hidden. The Service and Asset fields, if used or required, can also be further narrowed down with a pre-filter based on the configured services or asset.
Therefore, the configurations are shown in the following table:
| Parameter | Description |
|---|---|
| by employee | This parameter regulates whether the selection by employee should be made available. If configured for by employee with Yes , an employee for whom a change is to be made can be selected. If no , no employee selection is available. |
| by phone number | If this option is configured to Yes , a phone number selection is provided. If no, this is not available. It only makes sense to provide the number selection if a telephone number is also available for the provision of the service or if an asset is assigned to a telephone number. |
| nach service | Configuring yes after service is always necessary if the change relates to a service. In the case of a generic change, e.g. a project change, there is no assignment to a specific service. In this case, this option should be set to No. |
| Service Prefilter | The Service Prefilter option is only configurable if By Service is set to Yes. A selection field of all created services will then appear. You can then select the services whose service postings are to be displayed to the user in the selection list during the change process. This makes it much easier to choose from a large number of bookings. |
| by asset | Setting asset with Yes is always useful if the change is to be made to a specific asset. In all other cases, you should set this parameter to No. |
| Product Prefilter | The Product Prefilter option is configurable only if By Asset is set to Yes. A selection field of all created products will then appear. You can then select the product types/asset types whose assets are to be displayed to the user in the selection list during the change process. This makes it much easier to select a large number of assets. |
| Source Service | The source service represents the service in a migration from which to migrate to another service. If an analog extension is migrated to an IP extension, the service of the analog extension is specified as the source service. This service will then be terminated as part of the migration. However, a possible asset, e.g. the telephone number, is retained and will or can be transferred to the target service. Several services can be selected in the selection from which you can migrate. All selected services will receive a check mark in the list. |
| Target Service | The target service is now the antagonist of the source service. The source service is migrated to this and is thus ordered. Possible assets are then transferred to the target service in the migration process, if necessary and available . Here, too, several services can be selected and marked with a checkmark. |
Custom Form
To gather additional data for the users request it may be necessary to ask for further questions. ServicePlaza has a form builder, that will be used to create custom forms in a drag and drop manner.
Please use the existing documentation of the form builder for further assistance.
Dependences
The Dependencies tab is used to define the dependencies from this service to others. A distinction is made between preconditions and incompatibilities.
Preconditions configured need to be in card, in ordering process or already booked by the selected user so that this service can be ordered. Configuring multiple preconditions are AND conditions, while in the secondary level services are an OR condition.
Incompatibilities are used to lock services against each other. If a service is already booked (or in cart/ordering) that is incompatibly with the selected service an error message will show up to the user and will prevent from ordering the item.
Execution
On the Execution tab, items will be configured for their further process. Valid options are:
- Automation
Ordered item will be processed to be executed according to the selected Automation Workflow. - HelpDesk
Ordered item will be processed to the ServicePlaza HelpDesk. Depending on configuration, it will be automatically referenced into the selected queue. - Ticketsystem
When integrated with a 3rd Party ticket system, you may also redirect the created order to another ticket system and assign a matching ticket type like Request, Change, .. - Directly to postprocessing
Created order will instantly be processed internally and directly closed.
Product groups
Products groups organize products into logical groups. Administrators and authorized users can create and configure groups, according to their needs and later add products into these groups.
Products
Products are objects that can be ordered, terminated, or changed indirectly as services in the respective order and change processes. These are created and maintained in the Products tile.
Products, like the Services, cannot be deleted, in contrast to other entries in the ServicePlaza. This is due to the fact of audit security and prevents bookings made from being orphaned.
A product has a variety of properties that may be necessary for change processes and creating CI's, but do not have to be mandatory.
In the overview page of the products, all created products are displayed in table view:

General
The basic parameters of the respective product are defined on the General tab. The following table explains how the configuration can be done and what it does:
| Parameter | Description |
|---|---|
| Name | The name of the product that is entered here appears in the menus, e.g. the CMDB, as the title. The name cannot exceed 40 characters. |
| Name ID | Name ID must be a unique product identifier n that identifies it. It can be freely defined and can be seen as an alternative to the name. Since the name ID is a mandatory field, it can be equal to the Name field if not in use. The name ID is to be seen as an internal administrative instance. It is not displayed in user dialogs. |
| Group | For group , a selection is provided with all groups that have been created in the system. By grouping into a group, the selection can be reduced during filtering or sorted accordingly. |
| Manufacturer | The manufacturer of the hardware or the supplier of the service can be entered here in free text format, e.g. HP, Avaya or Damovo. |
| Model | Here, if the product is a physical element, the model name of the manufacturer is stored in free text format, e.g. DL 380 or, in the case of software, the name e.g. ServicePlaza. |
| Product ID | The product ID is the manufacturer's product type designation. Again, this can be entered in free text format. |
Asset Configuration
The second tab Asset Configuration defines whether an asset is to be created for the product or whether an asset is required in the CMDB. If the product is defined as an asset, it must be defined which asset category should be used and which is the unique identifier of the asset. Once these fields have been defined, they can no longer be changed. In addition, the syntax for the display name must be set. This can be changed afterwards.
The behavior of the asset is then defined for the processes. An asset can (must) be created during an ordering process or it can already be in the warehouse, is therefore already available and only a selection is required. This is regulated by the parameter "Create button" when assigned. Furthermore, it is determined whether an identifier can be changed or whether an asset may be deleted from the CMDB.
Following the basic asset behavior, the warranty tracking and warehouse management can optionally be used. The parameters for this are described in detail in the following table.
| Parameter | Description |
|---|---|
| Asset Configuration | |
| Product is Asset (Yes/No) | If the product is an element that is to be managed as an asset in the CMDB, e.g. a server, a telephone, etc., then Yes must be selected here. Subsequently, the CMDB must also be maintained accordingly for each order with this product. This then becomes mandatory in all processes in the ServicePlaza and cannot be skipped. This means that an order can only be completed when the asset has been created or changed in the CMDB. This is completely omitted if No is selected. Nevertheless, the product can be assigned to a service, but is then not identifiable. The client then knows that the service is provided, for example, with an Avaya J179 telephone, but does not know the specific telephone with the S/N 1234567. In this case, there is no traceability as to who received which asset and where it was installed. This means that all of the following parameters are not configurable in the asset configuration and asset behavior. |
| Identifier | The identifier determines which criterion is the unique identifier of the asset. To select, see serial number, serial number + name ID, MAC address, name ID, asset tag and hostname / FQDN. In order for a corresponding concrete asset to be created in the processes and in the CMDB, the selection must be made in such a way that it cannot be made several times. In the case of hardware, this is usually the serial number, in the case of software, the license key, which can be maintained as a serial number. |
| Asset Category | The asset category determines in which tile in inventory management the asset should be displayed. The asset category must have been previously created under Settings –> Services –> Inventory Management on the Asset Categories tab. |
| Assetname Syntax | This parameter defines the display name of the asset as it is represented in the processes and inventory management. You can choose between \<Identifier>, \<Identifier> (\<Product Name>) or \<Identifier> (\<Product Name>) and additionally \< Serial Number>, \<MAC Address>, \<Name ID>, \<Asset Tag> or \<Hostname/FQDN>. If the corresponding additional field is not filled, only \<Identifier> or \<Identifier> (\<Product Name>) is displayed. |
| Asset Behavior | |
| "Create button" when assigned | If the asset is to be managed in the CMDB, this switch is used to determine whether an asset has already been created in the CMDB and is therefore only assigned via an existing selection, or whether a new element is to be created in the corresponding process within the service plaza. |
| Erasable | In the event that an asset is to be deleted when it is no longer in use or has been retired, Yes must be specified in this selection. If, for historical reasons, it is to remain in the inventory even after its useful life, no must be set here. Note: If an asset is no longer in use and cannot be deleted, it is still possible to manage this asset via the status, e.g. to put it in stock or scrapped. |
| Identifier can be changed later | In some cases, it can be helpful to change the identifier of an asset afterwards. This is the case, for example, if the license key of a software changes due to a renewal. In this case, you don't want to reinvest the asset, because it hasn't changed. Therefore, in this case, this option can be set to Yes, so that a change is possible afterwards. In the case of a hardware asset, the default setting No would usually come into play, so that a serial number will not change. |
| Warranty | |
| Warranty (in months) | If warranty tracking is required for the asset, the number of months for the warranty period must be entered in this field. Once configured, another warranty tab will appear in the asset. |
| Warranty Start Trigger Status | This parameter specifies when the warranty for this asset should start. In many cases, the status in use is selected here, as this often represents the commissioning from an order. However, any other status can also be used. |
| Inventory Settings | |
| View Inventory | Yes or No determines whether this product should be managed in stock. In the first step, this only affects the asset and not the service. In order for the stock to be displayed on the service tile or in the order mask the availability, in stock or out of stock, the warehouse management must also be carried out in the configuration of the respective service. |
| Asset in the portfolio at | This selection determines the asset status at which the asset is counted as a portfolio. The selection is made by the user activating the desired status(s) for the count in the selection by clicking on it. The selected statuses are marked with a check mark at the end of the line. |
| Minimum inventory | Specifies the minimum stock that must be available for the product to be marked as in stock. If the quantity determined is 0 or less, it is not displayed in stock. |
| Displayed inventory | Shows the definitions made in the previous points, determined stock insofar as stock still exists. Example: If the product is 5x in the warehouse (customer) and 3x in the warehouse (Damovo), 8 products are in stock. However, if the minimum stock is 2 and 9 are already ordered – i.e. available in orders, this results in a real stock of -1. In this case, the user would be shown 0 as a quantity and out of stock for the product. If only 3 had already been ordered, he/she would receive 3 as a quantity and in stock as an advertisement. This results from quantity in stock minus minimum stock and ordered quantity. |
| Real stock | Displays the real inventory of the product. So in the example from the description above, 8 would be in the status Warehouse and 9 ordered would be the display -1. This is important for warehouse management. |
Description
On the Description input mask, you define how a product is displayed on the tiles, in menus and tables. Furthermore, there is the possibility to upload a picture or use a predefined.
The abstract is usually used next to the name of the General tab in parent menus or on tiles. The long description is used in the process steps in which the user may need further information about the item.
Please note the following limitations:
- Picture
must correspond to one of the file formats .jpeg, .jpg, .png, .gif and must have at least 32 x 32px and may have a maximum of 256 x 256px. With the Browse button you can upload a suitable image via the browser function. You can use the Reset button to remove an image. - Abstract
should not exceed 100 characters. - Long description
should not exceed 500 characters, otherwise these can no longer be displayed completely in the corresponding masks.
Custom Attributes
The Custom Attributes tab is intended for future versions and is not yet in use in this release.
Cancellation (of Services)
As services are recurring items, they may produce regularly costs to the users or their cost centers, so it may make sense to terminate those when no more needed.
To cancel a service, a generic cancel tile exists in the service catalog. This tile may be customized by authorized administrator users to their needs.
The following parameters may be customized:
- Cancellation date:
Select for Mid-Month or end of month cancellations - Group
Select the catalog group, the cancellation tile should show up. - Name
Enter the name of the cancellation service
Legend
This is a further information, that is shown to the users when cancelling services. It may be used to add further notes for the cancellation or terms of conditions. - Image
Select the image for cancellation tile - Description
Short description for the cancellation tile. - Long description
Long description for the cancellation process.
Shopping cart
The shopping cart is comparable to a shopping cart in the supermarket. It includes all services selected in the supermarket or better in this case from the service catalog. In the case of the service catalogue, this also includes the cancellations made, which are equally placed cart.

If the user has now placed all orders and cancellations of services in the shopping cart, the order in the shopping cart can now be finally processed and ordered. The user can access the shopping cart by clicking on the shopping cart symbol at the top right of the service catalog.
In the shopping cart, all services, and all employees for whom a service is to be ordered or cancelled are now listed. The employee and, if applicable, the telephone number for which a service is to be ordered or cancelled can be seen in the shopping cart on the left side. A separate tab can be seen for each employee. If you click on the respective tab, you can see the orders or cancellations for the respective employee.
In the order window of the corresponding employee, the title of the order is at the top. This contains the name of the employee, if available also the telephone number and the service. In the case of several services, various services appear there. If desired, the title can be adapted by the user.
Below it are the services that are to be ordered. If the user now wants to remove one or all of the services, this can be done by clicking on the symbol. The service is thus removed from the shopping cart. If it is the only or the last service for this employee, the entire tab is removed from the shopping cart.
Further queries for information or requests are then made under the listed services. First, the user can specify a desired date on which the service is to be provided. This is followed by the entry of shipping information for equipment, insofar as this is required, and to whom (to whose hands) this should be sent. If it is possible to book an on-site assignment for a service, the corresponding selection is then available. If the user now selects Use on site (with Yes), further input fields open.
Bulk imports of services and assets
For the add / change or remove of many services and/or assets, ServicePlaza offers functions for mass (bulk) import via template.
The ServicePlaza offers the menu item "Setup Wizard" 3 functions:
- Bulk Import Services
For importing services based on the services in the service catalog. This import can be found under the Filter Service Catalog in the setup wizard. - Bulk Import – Services with Assets
For the import of services and assets at once that are related, i.e., have a correlation. - Bulk Import Assets
For importing assets based on the products in the product catalog.
If you select one of the functions, the setup wizard opens, which is similar for all 3 functions.

The Excel template downloadable via the link is the same for all 3 functions. Depending on which function is performed, the wizard expects input:
- the service file, or
- the asset file, or
- Service and asset file
The service and asset files are each a CSV file that is generated from the completed Excel template.
The location selection at this point in the GUI refers to the location on which the order is listed as a ticket and has no significance for the collection of location data for an asset. The location data for a specific asset must be specified in the Excel template.
After uploading the service and/or asset file and specifying a location, the order can be processed further in the GUI. The ServicePlaza then performs a validation check* of the import files and shows inconsistencies and problems, which are usually based on incorrect input in the template. It must also be ensured that the services to be booked are also set as orderable in the catalogue. If the check is OK, the booking will be made after a final confirmation request.
*Possible causes of errors during import:
- incorrect spelling of references to catalog items
- spaces
- Service is set as not orderable in the service catalog.
- The service has set dependency or prerequisite in the service catalog that were not observed in the import.
- The same for assets, e.g. identifiers not maintained or already existing, would therefore be double, etc.
Excel template

The template consists of 2 tabs or spreadsheets, one each for services and assets.

Create CSV can be used to generate the service or asset file on the respective worksheet, which the setup wizard expects as input.
On the Service worksheet, the services are specified that should either be added( Add), changed (Change) or deleted (Remove). As part of this change, only the corresponding service will be modified, unless there is an asset reference. If there is an asset reference, it is mandatory to fill in the Assets spreadsheet. There must then be a product to which the service refers. What is actually used in the respective case depends on the configuration of the respective service and / or the product. The worksheet shall be completed as follows:

| Column | Description |
|---|---|
| Type | Add, Remote, Update |
| ServiceNameID | Identifies the service to be booked. References the Name ID field of a service in the service catalog. Here you have to pay attention to the absolutely exact spelling, applies in particular to any spaces, upper and lower case, etc. |
| StartDate | Specifies when the service should be booked (format: dd.mm.yyyy |
| EndDate | Sets the end date of the service. For data on (format: dd.mm.yyyy) |
| Sid | The SID number as a reference to existing servicebookings, relevant for Updates and Remove. |
| UserID | Here the UserID must be entered to which the service is posted. |
| PhoneNumber | If the service requires a phone number, it must be specified here. |
| AssetRef | If services and assets are imported at the same time, the reference to the asset sheet must be established. |
When filling the service sheet, depending on the type of modification, various mandatory information is required. These are:
- Add:Type, ServiceNameID, StartDate, UserID
- Remove:Type, ServiceNameID, Enddate, SID
- Update:Type, ServiceNameID, SID + Modification
On the Assets worksheet, as with the services, the assets are specified that should either be added( Add), changed (Change) or deleted (Remove). As part of this change, only the corresponding asset will be modified, unless there is a service reference. If there is a service reference, it is mandatory to fill in the Services spreadsheet. There must then be a service to which the asset references. What is specifically used in the respective case depends on the configuration of the respective service and / or product. The worksheet shall be completed as follows:

| Column | Description |
|---|---|
| Type | Add, Remote, Update |
| AssetRef | If services and assets are imported at the same time, the reference to the service sheet must be established. |
| Identifier | The unique identifier of the asset via which the asset can be uniquely identified in the CMDB must be specified here. What exactly the identifier is is defined for the respective product in the product catalog. e.g. the SN for the headset, the phone number for the UC profile. |
| ProductNameID | Refers to the product from the product catalog that describes the asset to be captured. It is referenced to the field "Name ID" of the product in the product catalog. Here it is important to pay attention to the absolutely exact spelling, especially for any spaces. |
| Status | Valid values are: STORAGE_CUSTOMER, STORAGE, SETUP, RESERVED, UNKNOWN, MISSING, SCRAPPED, DELETED_IN_EM, IN_USE |
| Sn | Serial number |
| NameID | additional usable field to the p rodukt |
| Mac | Mac Address |
| AssetTag | Asset Tag is an additional usable field to the Product that can be used, for example, to enter inventory numbers. |
| hostnameFQDN | Here the host name of the system can be specified if one exists. |
| UserID | User ID to which the asset is posted. |
| PhoneNumber | Indication of the telephone number for products that require a telephone number. |
| OrgUnitInheritance | "Yes" = The organization number is taken from the user ID "No" = The asset is posted to the Org. unit defined in the OrgUnit field |
| OrgUnit | Defines the org unit, e.g. DAMOVO |
| Sid | The SID number must be provided as a reference to the existing asset booking and is relevant for updates and removes. |
| Notes | Comment field, is displayed in the asset history, e.g. for storing higher-level project order numbers that are the basis of the mass import. |
As with the filling of the service spreadsheet, various mandatory information is also required for the Assets spreadsheet. These are always the same, namely:
- Type (Add/Update/Remove)
- Identifier
- ProductNameId
- Status
Optionally, additional data can be entered for an asset. These are either location data (green) or other asset-specific data (blue), which must be defined in the asset category of the product.

This optional location data includes the following fields:
- LocationNumber:The field defines the location to which the asset is posted. LocationNumber: refers to the "Location Number" field of a location where the OT Site ID is usually entered.
- Building: part of the building
- Floor:Floor
- Room:room
- rack:cabinet
Asset-specific data depends on the fields created for the asset in the respective asset category. These are also to be filled via the import. Since these can differ greatly, this data is not discussed in detail.
Basically, it can be stated:
- In the definition of the respective asset category (under Settings -> Service -> Inventory Management -> Asset Categories) additional fields can be created in the Form Builder. This can be done via a drag and drop function. The respective fields can be edited via Edit.

- The field "Property Name" on the API tab determines the name of the data record (here e.g. "fwMgmtip").

-
in the asset upload template you refer to the data record via
"details.fwMgmtip"
Typical use cases for bulk imports are:
Case 1 - Create Service (Mass Import Service):
- Fill or use the service sheet
- In the service sheet, add the service bookings by "Add", specify
Case 2 - Create service with asset (bulk import service and asset):
- Fill or use service and asset sheets
- In the service sheet, add the service postings by "Add", specify them and create the reference to the specific asset in the asset sheet via the sequential asset ref number
- Specify the asset data in the asset sheet for the asset ref number.
Case 3 - Update of data for an asset that already exists in the DB: (Mass import asset):
- Only the asset sheet is to be filled or used
- Select "Update" for the asset position and make the reference to the specific asset in the CMDB by specifying the identifier (for APs the MAC address) and product name ID (is mandatory) + changes.
- Only the changes to filled fields in the sheet are applied. Empty fields have no effect.
- If the contents of fields are to be deleted via the import, this can always be deleted with %EMPTY%. However, this is not possible for everyone. Therefore, override field content alternative e.g. with "-"
Case 4 - Reposting a service to an asset that already exists in the DB: (mass import service and asset):
- Service and asset sheets must be filled or used
- Add the service booking in the service sheet by "Add" and use the sequential asset ref number to establish the reference to the specific asset in the asset sheet
- In the asset sheet via Asset-Ref. Link to the service sheet
- Select "Update" for the asset position and make the reference to the specific asset in the CMDB by specifying the identifier (for APs the MAC address) and product name ID (is mandatory)
Case 5 - Termination/deletion of a service that may be linked to an asset: (Bulk Import Service):
- Service sheet must be filled or used
- In the service sheet, delete the service booking by "Remove" and take the actual SID number from the plaza as a reference
If the service is linked to an asset, the asset must also be adapted -> See case 3 (e.g. change AP of status of the asset "IN_USE" > "STORAGE", hostname, IP, PU user adjust, overwrite etc.)
Settings
In the settings , the basic configuration of the catalog takes place.
General settings
The following table describes the setting options.
| Parameter | Description |
|---|---|
| Display name | This allows the service to be renamed so that it appears in any menus with the configured name. |
| Currency used | Determine which currency is to be used for the ordering and billing functions at ServicePlaza. |
| Automatically fill in additional address data | This parameter controls whether the location data of the user objects should be automatically transferred in a running process, e.g. a purchase order or a change, or whether the user should and must select them independently. If Yes has been selected, they will be applied, if No then the user must select them from the pull down menu. |
| Cart Expiration Time (in hours) | Determines how long the filled shopping cart is cached for a user before it is discarded. This is necessary, for example, to release any reserved phone numbers. |
Groups
To create a new catalog group or a subgroup, press the Add Entry button. This creates an additional new line. Enter the name of the group and press the Save button at the bottom of the page.
To create a subgroup, you must have previously created a catalog group.
Please note that a catalog group or subgroup can only be deleted if it is not in use in any service or change. Otherwise, deletion is prevented. It is advisable to create a concept for catalog management in advance, as subsequent changes entail considerable effort.
Below group configuration, the required catalogs are configured. The ServicePlaza does not explicitly distinguish between the service and change catalog. You can combine services and changes in a catalog as desired. Ultimately, the mechanism of the catalog is a filter or outline and thus a sorting criterion.
The following table provides an overview of the setting options in the Services and Changes Management catalog:
| Parameter | Description |
|---|---|
| catalog groups | You can create your own groups in service and change groups. These later allow a better sorting or filtering or structuring of the services and the changes and can be selected and assigned when creating them on the respective general tab. |
| Subgroups | Untergruppen allow you to perform further sorting at a deeper level to achieve greater granularity. The function and mode of action is identical to that of the service and change groups. |
| Catalogues | Catalogues are used to divide products, services and changes into an overall catalogue. |
| Cart Expiration Time (in hours) | This option determines how long created orders that are in the shopping cart are retained if the user does not create any further orders. After expiry of the set time, the shopping cart will be deleted and any reservations will be cancelled. This is to prevent, for example, that phone numbers or services are blocked and that no further new orders can be created on them. |
Product groups
The product groups are managed in the third tab. The groups defined here are available to you as a grouping option when you create the products and assign them to product groups. The creation of product groups is optional.
To create a new product group, enter the name of the new product group before adding it and press the Add button. This creates an additional new line. Then press the Save button at the bottom of the page.
Import Template
In this tab a template for the two wizards for mass import can be saved / updated. This template is an Excel file in a certain format with the necessary columns and column names, which must be filled for the import according to the respective configuration.